Advant Plus now allows you to send fully formatted emails straight from Advant Plus.
Create a .csv file with all your contacts and relevant information. Your file must be saved in .csv format, use the headings below and not be password protected.
The .csv must include columns named , first_name, last_name and email_address. For those using Xplan, Adviser Logic, Worksorted or Midwinter, include the clients specific CRM email address in a column named crm_bcc_email in your .csv file prior to uploading to Advant Plus.

Download the subscriber list template with the relevant headings HERE.
1. To upload your subscriber list, start by click the Menu tab at the top of your screen and select Contact management from the drop-down menu.

2. When you reach the Contact management page, click the blue Upload contacts button.

3. Select Choose file.
You will only be able to select a .csv file to upload. Please ensure that your columns have been named as per above otherwise your file will not be accepted.
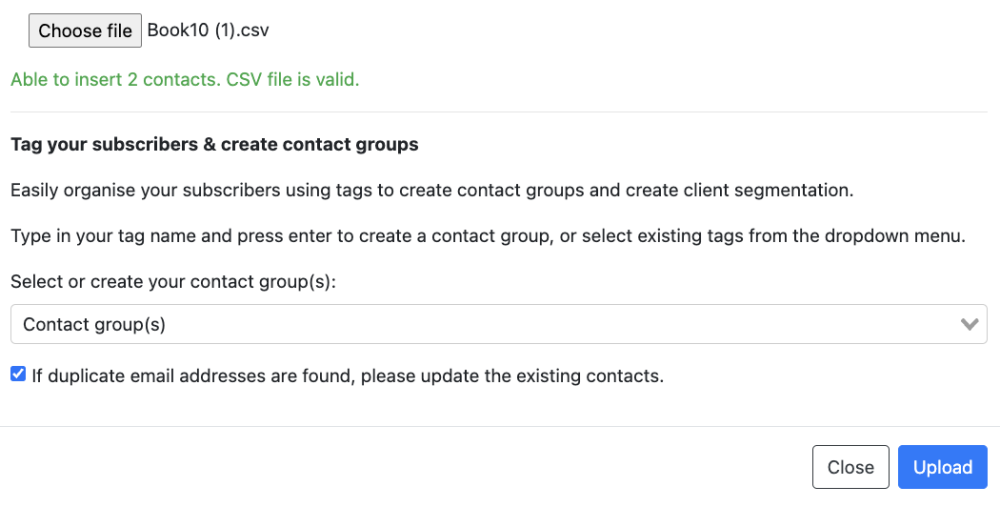
4. Tag your subscribers & create contact groups.
Easily organise your subscribers using tags to create contact groups and create client segmentation.
Type in your tag name and press enter to create a contact group, or select existing tags from the dropdown menu.
5. If you are ready to upload your list with the contact groups, select Upload.
If you are wanting to group your clients so that you can email different audiences, you can add or change your contact groups in the subscriber management. Simply select the check box next to each client you would like included in the group, then enter or select the contact group in the drop-down bar at the top of the page.
Multiple contact groups can be added to an individual client.
To remove a contact group from a client, simply select the ‘X’ next to the contact group tag.