Advant Plus also allows you to send your newsletters to your Mailchimp account, so you can send your clients beautifully formatted HTML newsletters, directly to their inbox.
To link your Mailchimp account to your Advant Plus account, simply select the Mailchimp option on your Linked Accounts page, and follow the prompts.
Once connected, your Mailchimp accounts will now display as an option to Post to under the Manage tab on your Advant Plus dashboard.
Sending via Mailchimp
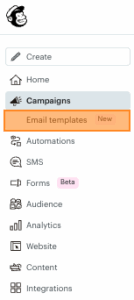
When you next log into Mailchimp, you should be able to see your newsletter or snapshot under Campaigns > Email templates.
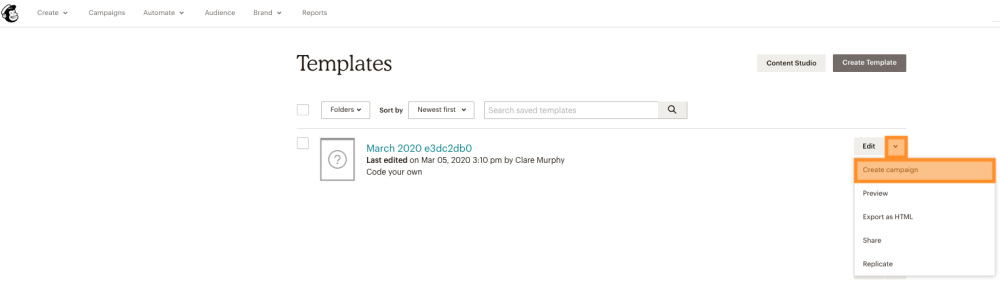
To create your campaign, select the arrow pointing down next to the ‘Edit’ button, then select ‘Create campaign’.
There are four main things to do before you can send your email:
1. Campaign name section
To start, give your campaign a name. This is the name that you will you will see when viewing your campaigns, your clients will not see this.
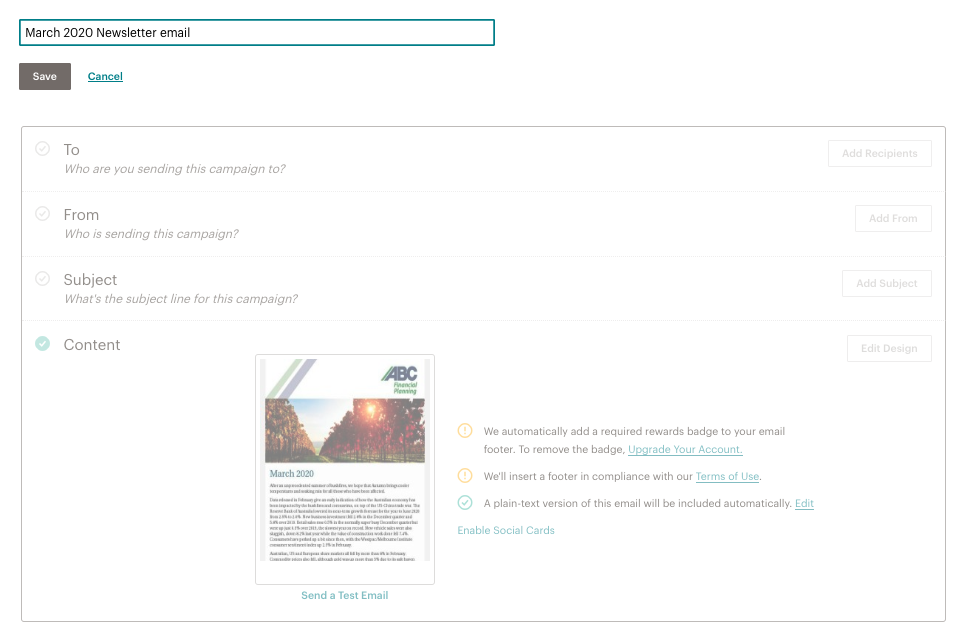
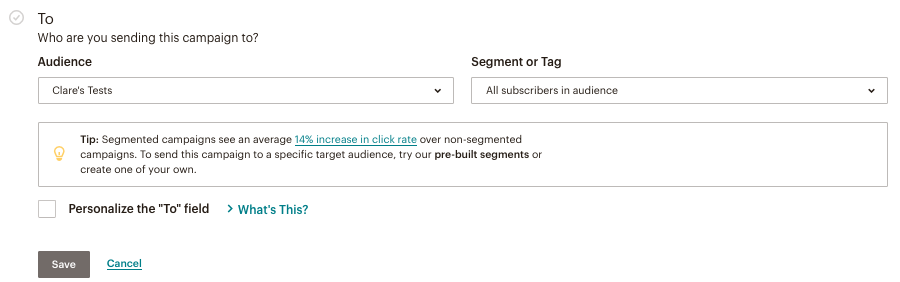
2. To section
Next, select who you would like to send the campaign to. If you have created a client list in Mailchimp you will see it listed here. You also have the option of segmenting your client list based on a number of different criteria. By default, Mailchimp will send to all the subscribed contacts.
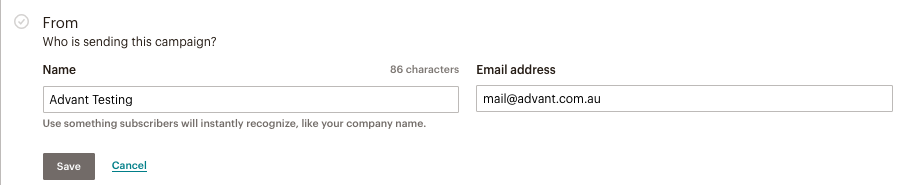
3. From section
Third, fill in the name and email you would like your clients to see in their inbox.
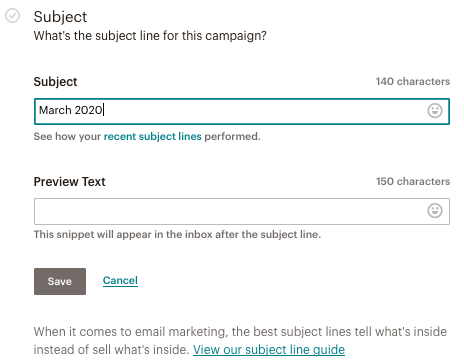
4. Subject section
Finally, add a subject to let your clients know what they are receiving. The preview text will automatically show the first section of your document.
If you want to preview your campaign before sending it out, select the thumbnail image below ‘Content’. You may also want to send a test email to yourself so you can preview what your clients are going to see when they open their email.
If you’re happy with all the details, select ‘Send’. Otherwise you can select ‘Finish later’ if you want to save the Campaign as a draft.
Watch our HOW TO send via Mailchimp tutorial: